
Deploy Astro sites to Azure Static Web Apps
There’s been a push of late to limit the amount of JavaScript sent down to the client as part of single-page or static web applications. I for one welcome this shift, as it means we as web developers are listening to the needs of our users, who don’t have limitless bandwidth or computing power. Sites load faster, scale better, have decreased load, consume less resources, help with climate change… It’s goodness all around.
One of the newest tools to enter this scene is Astro. Astro’s primary goal is to eliminate JavaScript wherever possible in “built” applications. What makes it unique is it’s working to support every framework. Given it’s being driven by the people who created Snowpack, my personal favorite bundler, I think there’s a lot of promise.
You can learn more from Astro’s readme about how to create a project, the new astro files, and how to configure various options. I want to focus on deployment. I’ll start with a core project, and then walk through the deployment process for Azure Static Web Apps.
Creating an Astro project
Astro uses npm init for project creation. This post does assume you have Node.js and NPM installed.
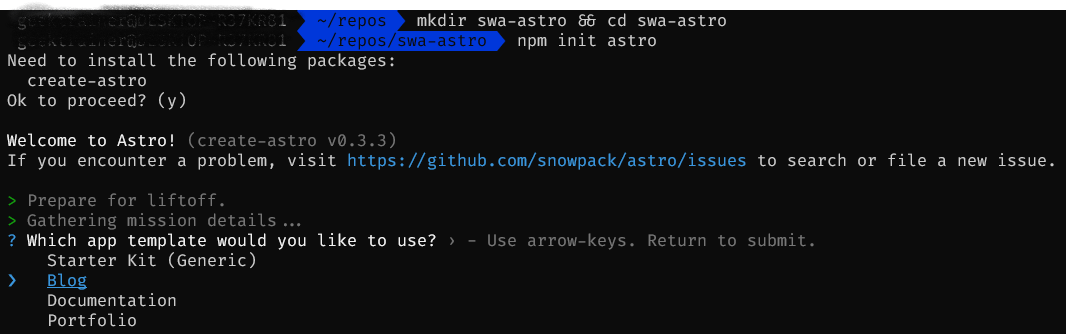
- Run the following from a terminal or command window to create your first project:
mkdir astro-swa && cd astro-swa
npm init astro
- You’ll be prompted to install the create-astro package, and then select the template. I’ll be selecting Blog.
- Once the template is created, you can install the packages, initialize your Git repository, and start the project.
npm install
git init && git add -A && git commit -m "Initial commit"
npm start
- As the project builds, you’ll notice Astro walking the tree and generating the appropriate HTML and CSS files. If you navigate to http://localhost:3000 you’ll be presented with Don’s blog.

Congratulations! You’ve now setup an Astro site.
Deploy to Azure Static Web Apps
Let’s deploy the project!
- If the site is still running, hit Ctl-C in the terminal window to stop the site. You can then open it in Visual Studio Code by executing:
code .
We’re going to use the Azure Static Web Apps extension to deploy the site.
- In Visual Studio Code, select the Azure icon.
![]()
- In the Static Web Apps panel, select Create Static Web App. This will launch the wizard, where you’ll select the following values:
- Select subscription: <Your Azure subscription>
- If prompted, follow the sign-in process for GitHub
- Name for the new static web app: swa-astro
- Name of the new GitHub repository: swa-astro
- Build preset: Custom
- Location of your application code: /
- Location of your build output: dist
Your site will now deploy! You may be prompted again to sign into GitHub; follow the steps as needed.
The one option from above I want to highlight is the build output. You’ll notice we set it to dist. dist is the default name of the folder generated by the build process. You can see this and modify it by exploring astro.config.mjs.
In fact, let’s open astro.config.mjs, as there’s a setting we do need to update. Below is the default configuration. Notice buildOptions.site. This is used to create canonical URLs and the sitemap for your site, both important for search engine optimization (SEO). Obviously our site name isn’t http://example.com.
export default {
  // projectRoot: '.',     // Where to resolve all URLs relative to. Useful if you have a monorepo project.
  // pages: './src/pages',   // Path to Astro components, pages, and data
  // dist: './dist',       // When running `astro build`, path to final static output
  // public: './public',   // A folder of static files Astro will copy to the root. Useful for favicons, images, and other files that don’t need processing.
  buildOptions: {
    site: 'http://example.com',           // Your public domain, e.g.: https://my-site.dev/. Used to generate sitemaps and canonical URLs.
    // sitemap: true,      // Generate sitemap (set to "false" to disable)
  },
  devOptions: {
    // port: 3000,         // The port to run the dev server on.
    // tailwindConfig: '', // Path to tailwind.config.js if used, e.g. './tailwind.config.js'
  },
};
Update the site name
Let’s update that value. We need to get the domain name generated by Azure Static Web Apps, update buildOptions.site, and redeploy our application.
-
In Visual Studio Code you should receive a dialog box after your site is successfully deployed with a button saying Browse Site; you can click this button to open your site in Azure Static Web Apps. Alternatively, you can alternate-click on swa-astro in the Static Web Apps extension and select Browse Site.
-
Copy the URL from the browser window. In my case it’s https://lively-tree-092735110.azurestaticapps.net/, but yours will be different.
-
Return to astro.config.mjs in Visual Studio Code. Set the
siteoption to your url:
// trimmed version
export default {
  // other options hidden
  buildOptions: {
    site: 'https://lively-tree-092735110.azurestaticapps.net/',
  },
  // other options hidden
};
-
Save the file.
-
Return to your terminal or command window, and execute the following commands to add and commit the change locally, and push it to GitHub.
git add -am "Updated site"
git push
Your site will now be redeployed through the magic of Azure Static Web Apps. During this process the sitemap.xml will be created correctly.
Next steps
Congratulations! You’ve now configured and deployed an Astro site to Azure Static Web Apps. From here you can continue to dig into Astro, which is a really nice set of tools. You can also explore more about Azure Static Web Apps, which has a host of neat features including built-in authentication and authorization